Nanobot's Hair Painting Tutorial
Note I now have a video tutorial with more updated techniques you may want to see instead.
Some people in one of the threads on the DAZ3D forums asked me to do a tutorial of how I paint hair, and voila! Ask and ye shall receive.
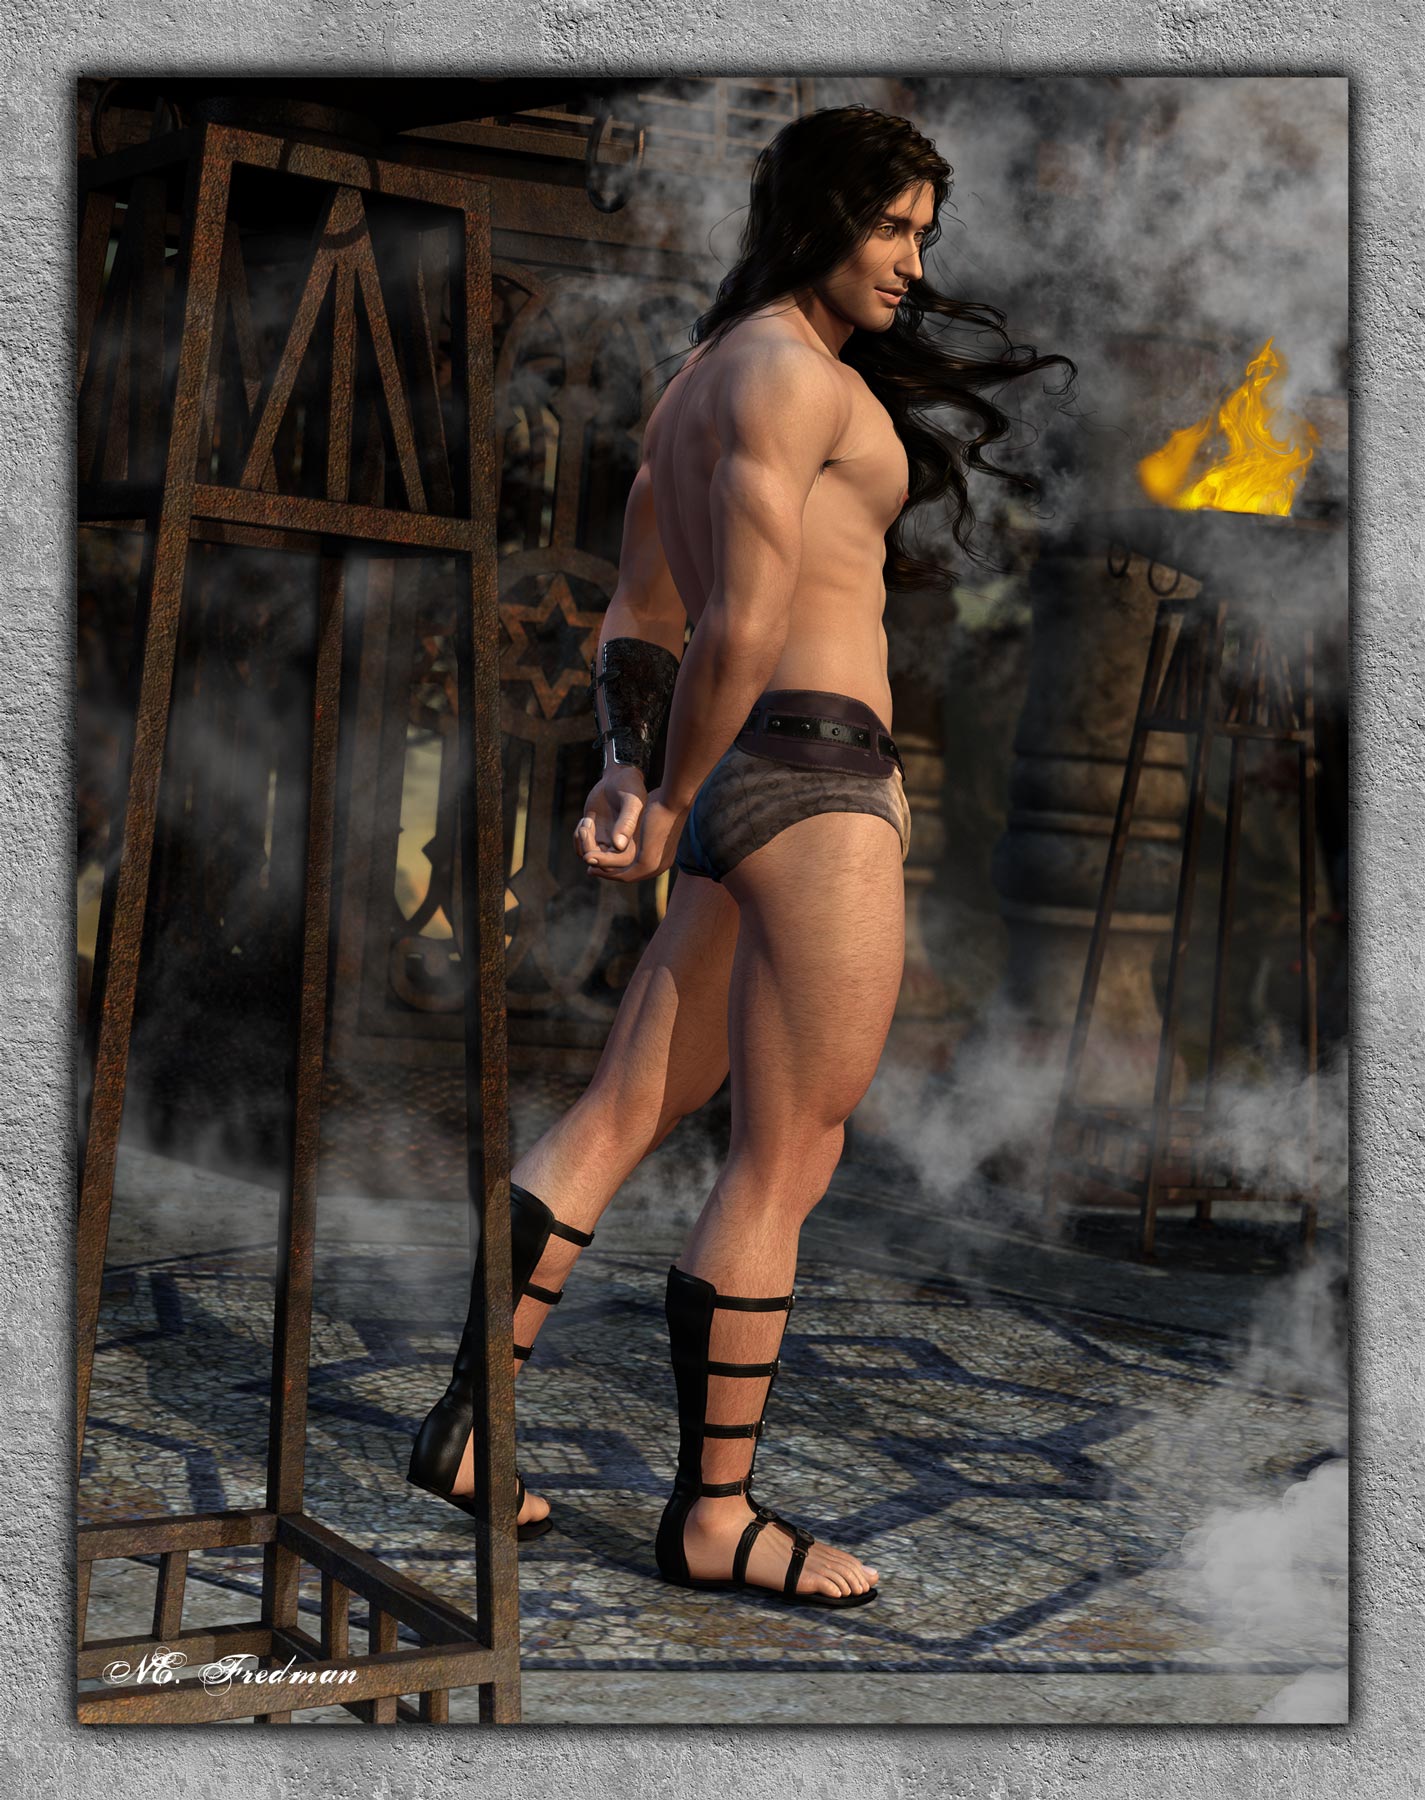
I had an idea for a dramatic super-hero-ish kind of picture that would be perfect for painting two kinds of straight hair (curly hair is similar but needs its own demo): very long and shorter and springier.
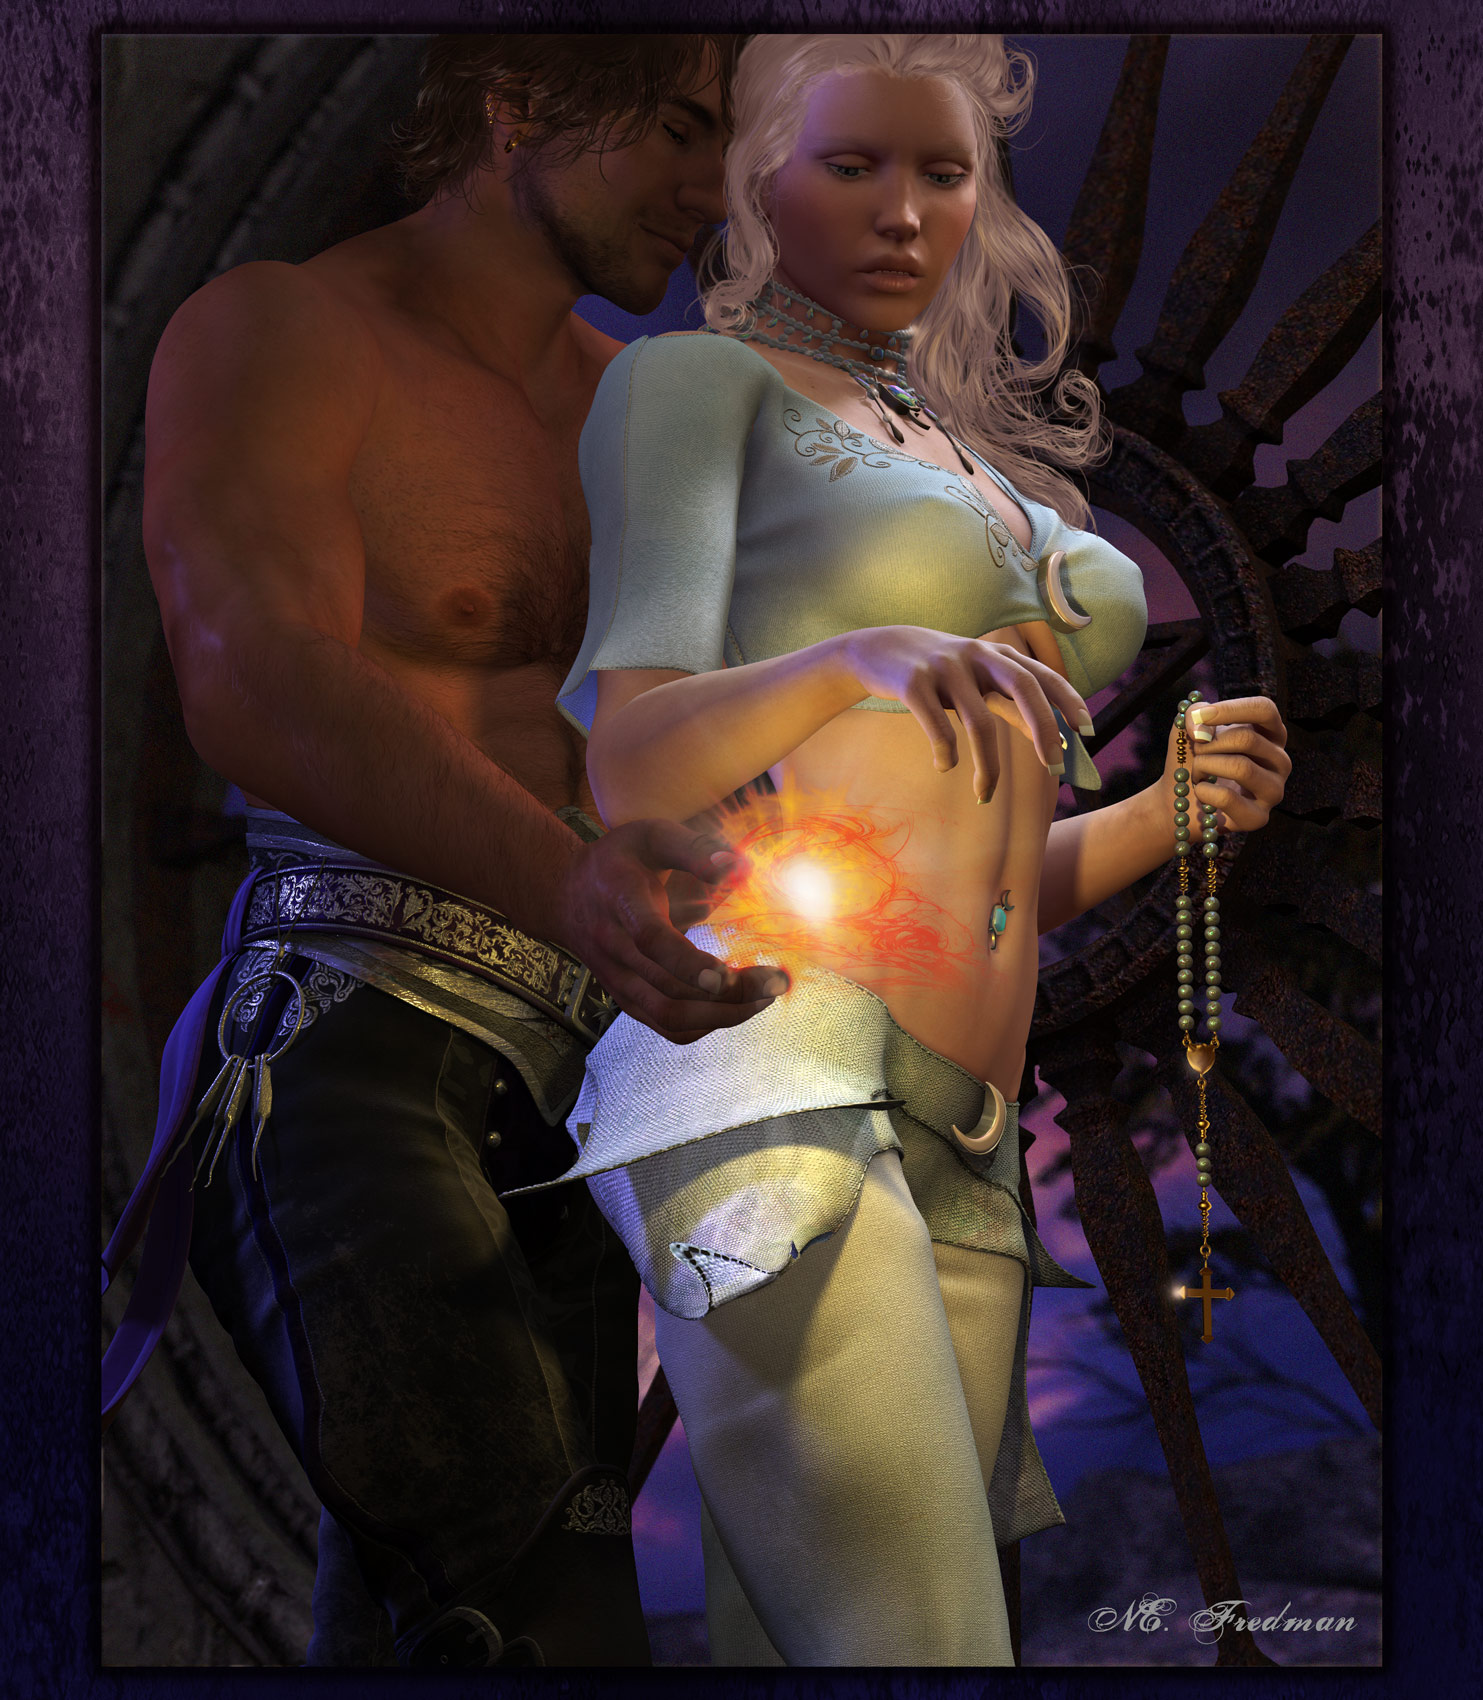
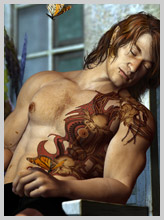
Here's the end product: Meri, left, is a kitsune, so his hair is more fur-like. Ian, right, has lovely waist-length blonde hair, so we of course have to have a nice breeze blowing. Hey, it's my pic, so we get a breeze. Or one came up just as we looked up and saw them on the rooftop.
It's important to have some idea of where you're going to end up when rendering this. I paid a lot of attention to how they were lit from below when setting up. Posing and setup probably took about three hours on this, which is pretty quick. I didn't use any canned poses. The set is from Antfarm's BC Rooftop series. I also did NOT use a background, here, just colored it about what I wanted it to come out like in the end.
And, when rendering, I have Python scripts that come with RDNA's Render Studio for Poser that allow me to do two important extra renders: the depth-map render and an alpha channel render (which lets me mask the figures against the background). If you don't know what those are...wait and I'll explain after this is all posted.
First, the final product (click for larger on all of these):

OK. To start with, the render itself. I did the corrective postwork first--just fixing up little blivits and dits, poke-thrus, whatever.
By the way, render BIG to start. When it's all over with, reduce the size for upload. This one's width was 1600 pixels. (I'm cropping for the tut, not because I cropped at any point.)

I use Poser 7 and Photoshop CS3 for this, on a PC, a Dell XPS 720 H2C...which is why the two renders (color & depth-cue) took about an hour and a half. Not rendering transmapped hair sure saves time! I also use Ambient Occlusion on all my figures. Again, this is done via a Python script that's part of Render Studio, all in one blow, so to speak.
Because the Photoshop version of the color render comes with an alpha channel that effectively lets me mask out the plain background, well, I used it to delete the plain background and put in this violet bg, add some noise (Gaussian monochrome 5%) and some blur (Gaussian 1px). I've also already done the lens blur using the depth cue...it should be subtle, but the effect is like adjusting your F-stop on a camera.
At this point, look at the way the light hits their heads and shoulders, and where the shadows and highlights are! This is important. It will guide how we put shadows and highlights on the hair as we paint it.
Now, make a new layer above the figures for the hair. I only use one. So, there are three layers, basically, now, from top down:
hair
figure
background
Now I rough in the hair on its layer using a medium-dark color. These guys are both blonde, and their coloration is more ashy than rosy, so they get a fairly dark amber tone.
This is the only place I use any special brushes. Well, sometimes to erase with. But this is a 21-pixel "natural" brush that came with photoshop. The settings are:
Shape Dynamics on
Pen Pressure
Opacity = 100%
Flow = 100%
The reason I use the funny brush at this point is to help with the hairlines, so they aren't perfectly smooth.
About hairlines: look in the mirror and pull your hair back (assuming you have some). It comes forward on the front top of the head, back some above the temples, forward at the temples--pretty close to the eyebrows sometimes--and then back and down in front of the ears. It is NOT even and smooth, and there are a ton of eentsy little hairs, if you have anything longer than a crew cut, that soften that line, too. So our first cut at the shape reflects that.
Also, note that I'm not pulling out the final shape, here. This is just blocking out the main mass of the hair. Hair is three dimensional and has volume, in the abstract, and we're just getting the rough silhouette of it here. No detail yet. Wait for that...there will be enough crazy detail later!
Also, I have these neat hair color palette JPEGs that I got from Jaeger a million years ago that I use to pick colors. It's only a rough guide, but very helpful. The second picture shows that. You can see on the right how big my swatch palette is. I went through all my hair color palettes and put them into my swatches. Hmm, I should make that available via my web site. Well, later.

Let me also add that from this point on, I work at about 300% magnification! We'll pull out to get the whole effect as we go, but you gotta work large to start with.

Now, there are places where the hair should be *behind* Ian, so I make a selection from the figure layer and use that to clean up a little around his arm and hip.

Still on the hair layer.
Drop the selection we used to clean up. Don't want it now.
Now I start extending the real shape of the hair with the medium color. My brush is now a soft round 4 pixel brush, using about 80% opacity and 80% flow.
Once I get the general shape of the hair settled, I can think about the putting in the first highlight--really, starting to "model" the depth of the hair in 2D.
His hair is long, straight, and there's a little breeze playing with it. Since it has weight, it's not going to all float to the side, so it's a bit diagonal in direction. Hold the stylus lightly and paint using pen pressure and sweeping strokes. However, consider each stroke before you put it down. Don't be in a hurry to do this. You keep your grip on the stylus loose so your "hand" (in artist-speak) can inform the way the strokes look. This is very important! It's also one reason you can't paint well with a mouse alone.
The brightest light is coming from below, so I picked up a warmer lighter more saturated color and drifted that in about where the light should hit it.
It's hard to be more specific than that. Look at real life hair, and hair in fashion magazines and pay attention to where the lighter masses are--at this point we're thinking of the hair mass as strandy clumps, and working loosely. It will get more volume as we go.
It's important, also , to have the brush working transparently, so make sure you're no more than 80% opacity and flow, but no less than 70%.

Doing the same thing for Meri. His hair stands up more, so the lighter areas will reflect that.
Really, the light parts we paint now are just a guide to where we'll put the lighter highlights.

Pull back to 100% magnification for a minute. How are we doing?
Huh, not so bad. Time to blend, now.
Still unblended:

OK, blending. I don't do a lot of this, but there's a point where you're putting in the modeling, and you want to smooth the parts of the hair where it turns away from you, because hair doesn't (usually) turn hard corners!
Arrows mark a couple of notable areas where I blended on Ian.
What brush:
Smudge tool (the finger)
3 pixel
soft round brush
87% strength
Shape dynamics, pen pressure on


If you check these with the pix just previous, it's pretty subtle, isn't it? Yup. You do NOT want to go blurring all the hair--you worked hard to get the lovely linework in there, don't ruin it!
Back to painting with the soft round 2-pixel brush, about 75% opacity, 75% flow, shape dynamics = pen pressure.
This is the fun part! I picked a lighter color, and looking carefully where the light parts were, started stroking over those. More where the hair comes forward. Just a teeny bit into the areas that move back.
Shadow:
I actually picked up some of that shadow from under his chin and under his arm--it was dark red and fairly saturated--and stroked carefully into the bazillion little triangular areas where the hair recedes from the viewers (you and me). Ofteh this is right next to where the highlights are!
When in doubt, use a fairly saturated cool dark red for this shadow. If I were painting in oils (which I also do), I would use Alizarin Crimson for the shadows.
Painterly tip: the detail and texture lies in the light areas. You do not put detail into the shadows, generally. Certainly not in hair.

Same goes for Meri, but I picked up some of the color where the dark red blended with the dark gold, and used that. See how the shadows are little triangular and trapezoidal areas.

More highlights! I actually used a color picked right from the highlight othe end of Ian's nose, here. It's pretty light. Went to a 2-pixel round soft brush, just worked int gently . Started pulling strand up over the background--nobody's creme rinse works 100% of the time, so there are little hints of flyaway hairs, single strands twisted by the wind across his face.
I corrected shadows where necessary to make the part on that side of his neck under his ear recede and have some depths.
Little fuzzy hairs also got short strokes at his hairline in a very light color--most people have their hair at their hairline a bit lighter than the mass of the rest of it.
Followed the curve of the hair with light strokes. used those to bring in strandy texture across his chest, especially.
Same for Meri. His hair is shorter & springier, so strokes are shorter and springier, too.


Pull back to 100% and check our work.

OK, The hair is pretty well modeled. Notice that I do not paint *every* hair! Well, in some of the light areas. Definitely not in the dark.
However, there's something important yet to be done, and that is to bring the color of the rest of the environment into the hair so that it fits into its setting properly. This means you take some of the sky/backround color and paint that into it.
I use a strangely teal color in this picture, even though the sky is more violet--but the foreground is warm, so teal is a compromise.
The first picture shows that I just laid that in very subtly. This is not something your eye should be able to pick out easily after you've done it. Also, since it's sky color, it should be at the *top* of the little hair masses/clumps.
Arrows show where I put it in Ian's hair (well, most of the spots).


See how much better the hair sits into the picture now. Looks less like it was added after the fact.

Now we want to make the highlights both pop more and also match up with the rest of the scene.
Make a new layer for the hair lights.
Use a bigger soft round brush and just place those over the other lighter areas. Doesn't have to be perfectly places, and not hair by hair--we're going to affect small areas, not hairs here.
Put a periwinkle blue on the *top* areas and a peach on the *bottom* light areas. I made a mask using the Hair layer in teh Hair light are ("Layer 2" in the pic)
After I did that, I changed the layer blending to Overlay.

Peach color added here:


There is ONE MORE thing to do to make the hair sit properly on the people. Guessed yet? Well, probably you did.
Hair leaves shadows! So, I pick that dark red color, make a copy of the hair layer, lock its transparency, fill it with that dark red color.
Unlock the transparency and use Gaussian blur at 1 pixel radius.
Move the new shadow layer *under* the hair layer.
However, there is nothing above them to have the shadow lie on, so we hide the hair layer, and working on the hair shadow layer, erase all the areas that are not actually on a person or clothing. You don't have to be massively precise about this. A larger soft round eraser brush is fine.
When you're done, nudge that layer up (vertically on the screen) using the move tool. This is because most of the light is coming from below, so the shadow would be "up."


We're done! Here's what they look like on a that plain background:

Again, the finished product, for comparison.
# # #


